
Imagine the smell of freshly baked Artisan Italian Bread in your kitchen. It feels like stepping into a traditional Italian Bakery. Making this delicious bread at home is easy with a simple recipe and the right techniques. It only takes under 4 hours, making it a fun project for any home baker.
To start, check out Artisan Italian Bread recipe for a detailed guide.
Table of contents
Key Takeaways
- You can make Artisan Italian Bread at home in less than 4 hours.
- The recipe requires only 5 simple ingredients, likely already available in most households.
- The hydration level of the dough is increased for more air holes, resulting in a stickier dough.
- A pan of hot water is used in the oven to create steam and ensure a crispier crust.
- The bread should ideally be eaten within one day, or sliced and frozen for longer storage.
- The recipe utilizes both all-purpose flour and bread flour, with bread flour yielding better structure due to higher gluten content.
The History and Heritage of Artisan Italian Bread
Exploring Classic Italian Bread reveals a long history. Italy’s bread-making tradition spans centuries. Each region has its own bread-making style and ingredients.
From Tuscany’s crusty breads to Sicily’s soft ones, every region has its own flavor. This shows how versatile Authentic Artisan Bread can be.
The roots of Italian bread making go back to ancient times. Each region has passed down its bread-making secrets through generations. The use of natural fermentation and high-quality ingredients has kept each bread’s unique taste alive.
Whether it’s Ciabatta’s airy crumb or Pane di Altamura’s dense one, each bread has its own tale.
Artisan Italian Bread is known for:
- High-quality, unbleached flour
- Natural fermentation processes
- Traditional baking methods
- Regional ingredients and techniques
The artisan bread movement keeps these traditional methods alive. It focuses on quality, tradition, and regional heritage. Classic Italian Bread is a key part of Italian cuisine and is loved worldwide.
| Bread Type | Region | Characteristics |
|---|---|---|
| Ciabatta | Veneto | Airy, open crumb with a slightly tangy flavor |
| Focaccia | Liguria | Rich, savory flavor with a soft, pillowy texture |
| Pane di Altamura | Apulia | Dense, nutty crumb with a thick crust |
Essential Ingredients for Perfect Italian Bread
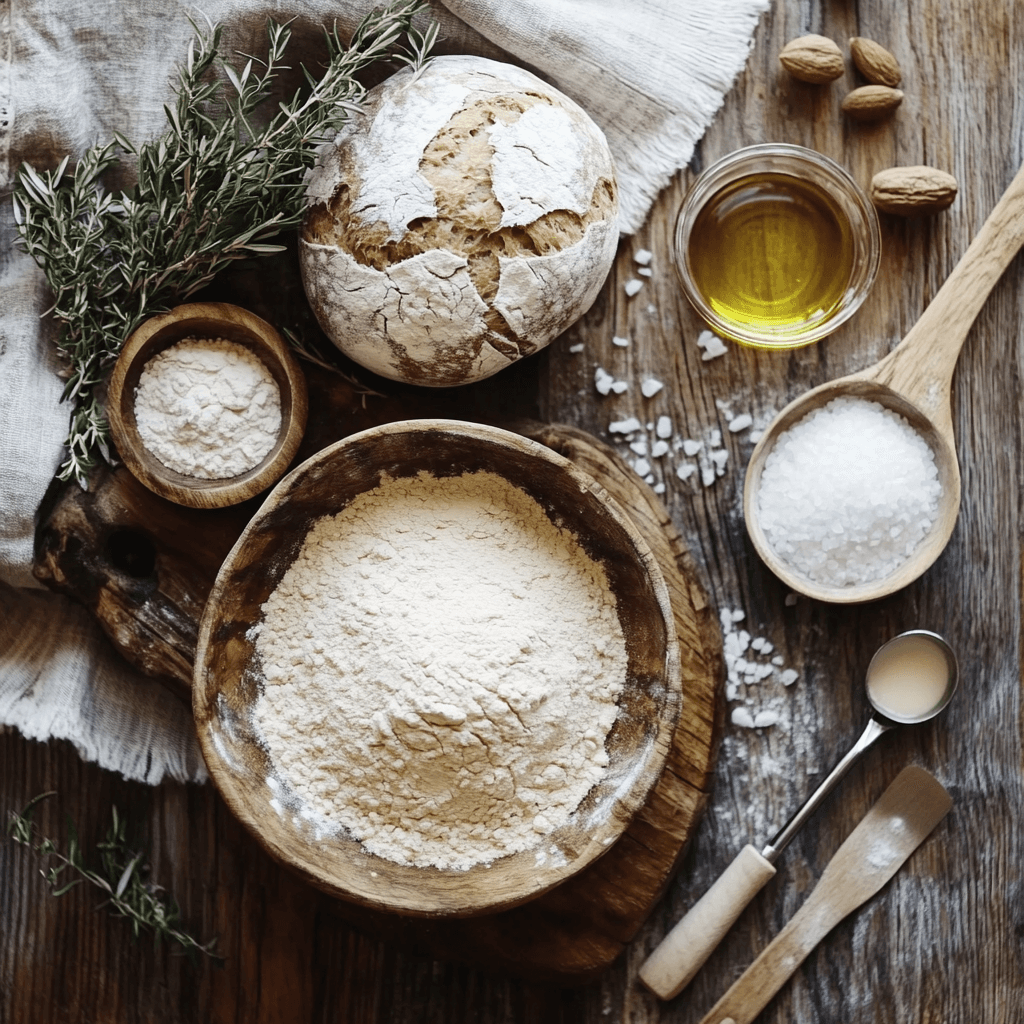
To make tasty Homemade Italian Loaves, you need a few key ingredients. These are flour, water, yeast, salt, and sometimes sugar. Bread flour is better than all-purpose flour for a chewier texture in Italian bread.
In Traditional Italian Baking, the quality of your ingredients matters a lot. High-quality yeast, like instant yeast, makes your dough rise faster. Also, using whole milk instead of low-fat or non-dairy milk improves taste and texture. Olive oil is key too, as it adds flavor and makes the bread tender.
With these essential ingredients and traditional baking methods, you can make delicious Homemade Italian Loaves. They’re perfect for any time.
Required Tools and Equipment for Baking
To bake amazing Fresh Baked Bread, like Rustic Italian Breads, you need the right tools. While you can bake with just a few things, the right tools really help. They make your bread better and more consistent.
A good scale is key for measuring right. You’ll also need dough scraping tools, like 6″ and 8″ sizes. A big proofing box can hold dough as big as 4kg batches. A cast iron pot helps dough rise by trapping steam.
Basic Kitchen Equipment
You’ll need some basic kitchen stuff for baking Fresh Baked Bread. This includes:
- A mixing bowl
- A baking sheet
- A measuring cup
- A wooden spoon
Professional Baker’s Tools
If you’re serious about baking, get professional tools. These include:
- A stand mixer
- A bread peel
- A pizza stone
Optional Enhancement Tools
There are tools that can make your Italian loaf even better. These include:
| Tool | Description |
|---|---|
| Reusable bowl covers | Help prevent skin formation on dough |
| Flour storage containers | Airtight containers for storing flour |
| High extraction flour | Specific milling techniques for desired flour characteristics |
With the right tools and equipment, you can make amazing Fresh Baked Bread. It will impress everyone you share it with.
Understanding the Science of Bread Making
Exploring Artisan Italian Bread means diving into the science behind it. Bread making is a mix of chemistry, physics, and biology. To make a tasty Italian loaf, you need to grasp the chemical changes during mixing, fermentation, and baking.
Temperature, humidity, and yeast activity are key for perfect Italian Bakery bread. Pre-ferments like poolish or biga also matter a lot. For instance, poolish has a flour-to-water ratio of 1:1, while biga is drier and can last longer.
Here are some important points about pre-ferments:
- Yeast percentage: 0.1% – 0.2% of flour weight for a 12-hour poolish
- Temperature: ideal temperature for fermentation is between 75°F and 80°F
- Humidity: maintaining a humid environment can help control yeast activity
Knowing the science of bread making helps you improve your loaf and solve common issues. Whether you’re new or experienced, mastering Artisan Italian Bread takes patience, practice, and a solid grasp of chemistry and physics.
| Pre-ferment | Flour-to-Water Ratio | Yeast Percentage |
|---|---|---|
| Poolish | 1:1 | 0.1% – 0.2% |
| Biga | 1:0.5 | 0.05% – 0.1% |
Mastering Authentic Artisan Italian Bread Techniques
To make a delicious Italian loaf, you need to learn artisan bread making. This takes practice, patience, and dedication. Each step, from kneading to baking, is key to a crusty outside and soft inside.
Kneading can be done by hand or with a stand mixer. The water should be 79 degrees Fahrenheit for the best yeast activity. Fermentation and proofing are also important. They help the dough rise and give it flavor and texture.
Proper Kneading Methods
Proper kneading involves stretching and folding to develop gluten. You can use a stand mixer or knead by hand. Knead for about 10 minutes to get it right.
Fermentation and Proofing
Fermentation and proofing are key steps. Yeast makes the dough rise during fermentation. Proofing lets the dough rest, enhancing flavor and texture.
Using a pre-ferment like in ciabatta bread adds a special touch.
Shaping Your Loaf
Shaping is the final step. Gently shape the dough into its final form. Handle it carefully to avoid making it dense.
With practice, you’ll make a beautiful, delicious Italian Bread.
Some popular artisan breads include:
- Italian Round Artisan Bread
- Cheesy Semolina Artisan Bread
- Cranberry Walnut Artisan Bread
- French Baguette
You can find these at places like Lunds & Byerlys and Izzio Artisan Bakery. They’re great for recipes like Panzanella and roasted garlic bread.
The Step-by-Step Baking Process
To make delicious Homemade Italian Loaves, follow a series of steps. The baking process is key in Traditional Italian Baking. It needs attention to detail and patience.
You’ll prepare your workspace, mix and ferment the dough, shape the loaves, and bake them to perfection.
Here’s a brief overview of the steps involved in the baking process:
- Prepare your workspace by clearing a large area and gathering all the necessary ingredients and equipment.
- Mix and ferment the dough, allowing it to rest for a few hours to develop the flavors and texture.
- Shape the loaves and let them proof for another 40 minutes to an hour.
- Preheat your oven to 450ºF (232ºC) and bake the loaves for approximately 30 minutes, or until they’re golden brown.
During baking, keeping the right temperature and humidity is crucial. This ensures your Homemade Italian Loaves are light and crispy. With practice and patience, you’ll impress your family and friends with delicious Traditional Italian Baking treats.
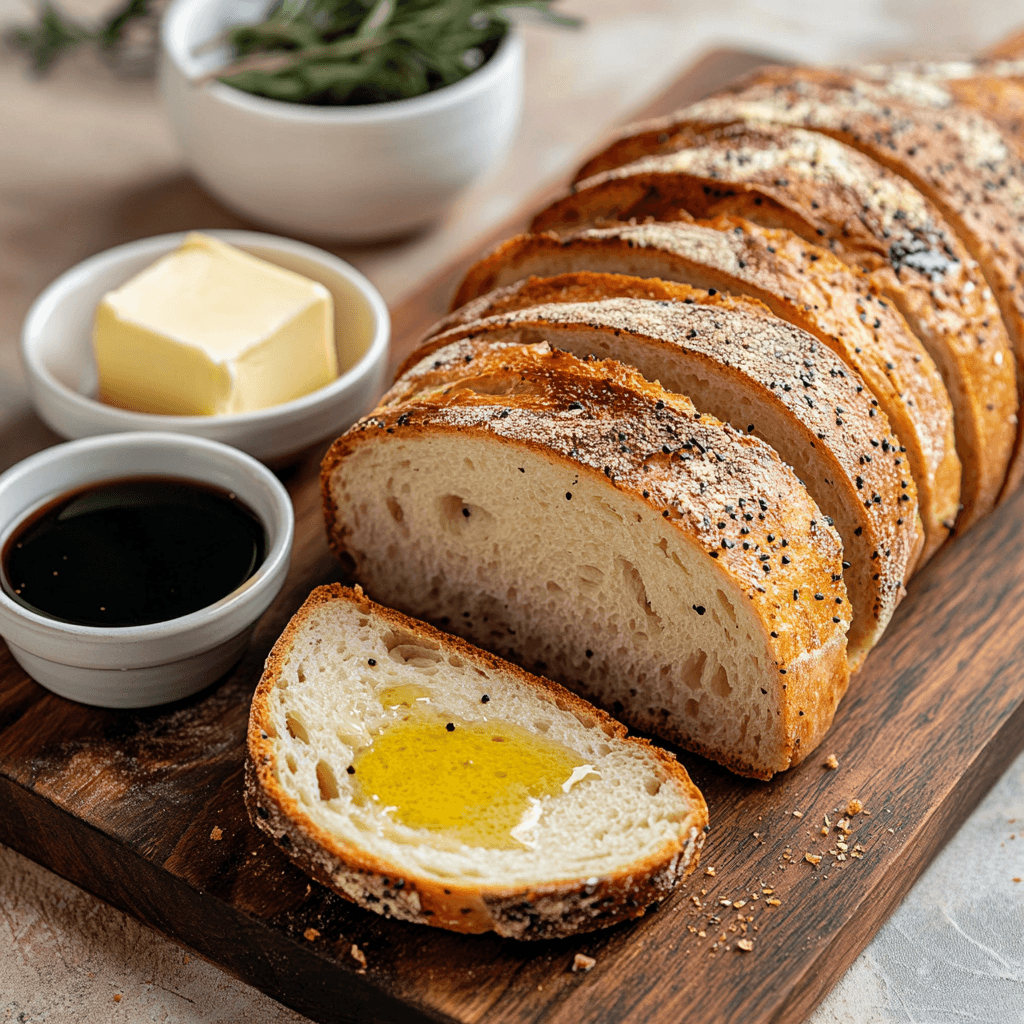
By following these steps and using the right ingredients, you’ll create authentic Homemade Italian Loaves. They’re perfect for snacking, sandwiches, or with your favorite soups and stews. Remember to store your freshly baked loaves in a cool, dry place to keep them fresh and flavorful.
| Ingredient | Quantity |
|---|---|
| Flour | 845 grams |
| Yeast | 1.5 tablespoons |
| Salt | 1.5 tablespoons |
| Water | 3 ½ cups |
Common Challenges and Troubleshooting Tips
Starting your journey to make Fresh Baked Bread can come with challenges. Issues like overmixing, underproofing, and overbaking are common. To solve these, keep an eye on temperature, humidity, and yeast activity.
Here are some tips to help you get it right:
- Make sure your yeast is fresh, as it affects the bread’s rise.
- Use water that’s not too hot, around 125 to 130°F, to avoid killing the yeast.
- Fluff your flour before measuring to avoid a dense loaf.
Also, consider these statistics:
| Challenge | Solution |
|---|---|
| Overmixing | Mix ingredients just until they come together in a shaggy mass. |
| Underproofing | Let the dough rest for 12-18 hours to allow for proper fermentation. |
| Overbaking | Check the bread’s internal temperature, which should be around 200°F. |
Follow these tips to make delicious Rustic Italian Breads. Remember, patience and practice are key to becoming a bread-making pro.
Storing and Maintaining Freshness
Keeping your Artisan Italian Bread fresh is key. You’ve learned to bake it at home. Now, learn how to keep it fresh. Each storage method has its own benefits and challenges.
Think about the bread type you baked. Sourdough can last a week or more. Whole grain loaves get better in flavor 2-3 days after baking. Store your bread in a cool, dry place, away from sunlight.
Proper Storage Methods
To keep your bread fresh, store it on a cutting board for 1-2 days. Then, move it to a breadbox. In dry climates, a breadbox is crucial. In humid areas, sliced bread might need the fridge to avoid mold.
Here are some tips for storing your Artisan Italian Bread:
- Store at room temperature for up to 2 days
- Refrigerate for up to 5 days, but note that this can accelerate staling
- Freeze for up to 3 months, either as a whole loaf or individual slices
Freezing and Thawing
Freezing is great for keeping your bread fresh. It stops the staling process. Slice the bread before freezing and arrange slices in a bag. This saves space and keeps the bread fresh.
By following these tips, you can enjoy your Artisan Italian Bread longer. Always check for mold or staleness before eating.
Creative Variations and Flavor Additions
Once you get the hang of baking Classic Italian Bread, you can try out different variations. This makes your Authentic Artisan Bread truly unique. You can pick flavors and ingredients that you like best.
Some tasty ideas include adding cheese, peppers, veggies, seeds, and bacon. Fresh herbs like basil or rosemary can also make your bread smell amazing. For something sweeter, try adding dried fruits or nuts.
Here are some ideas for creative variations and flavor additions:
- Herb and seasoning options: Try adding different herbs and spices, such as oregano, thyme, or garlic, to create a unique flavor profile.
- Whole grain options: Experiment with different types of whole grains, such as whole wheat, rye, or Kamut, to add texture and nutrition to your bread.
- Special occasion variations: Create a special bread for holidays or events, such as a sweet bread for Easter or a savory bread for Thanksgiving.
Remember, the key to making a delicious and unique bread is to have fun and experiment. Try new ingredients and flavor combinations to make your Classic Italian Bread special.
| Flavor Addition | Description |
|---|---|
| Herbs | Fresh or dried herbs, such as basil or rosemary, add a fragrant and flavorful twist to your bread. |
| Cheese | Grated or cubed cheese, such as parmesan or mozzarella, adds a rich and creamy flavor to your bread. |
| Nuts | Chopped nuts, such as walnuts or almonds, add a crunchy texture and nutty flavor to your bread. |
Conclusion: Your Journey to Becoming an Italian Bread Baker
Your journey to becoming a skilled Italian bread baker has started. You’ve learned a lot from this guide. Now, you’re ready to master traditional Italian bread baking.
Remember, making perfect homemade Italian loaves takes time and effort. Every loaf you make shows your growing skills. It also connects you to Italian baking’s rich heritage. Keep practicing, trying new things, and learning from your mistakes.
Keep going on your journey by finding more resources and joining baking groups. Explore the many bread types that make Italian food special. With dedication, you’ll make bread that not only feeds your body but also your soul.
FAQ
What is the history and heritage of artisan Italian bread?
Artisan Italian bread has a rich history. It dates back to ancient Roman times. Each region in Italy has its own bread-making traditions.
The artisan bread movement keeps these traditions alive. It ensures authentic, high-quality Italian bread is made.
What are the essential ingredients needed to bake artisan Italian bread?
To bake artisan Italian bread, you need quality flour, yeast, salt, and water. The type and amount of each ingredient matter a lot.
What tools and equipment are required for baking artisan Italian bread?
You’ll need basic kitchen tools like a bowl, baking sheet, and oven. Tools like a stand mixer and bread peel are helpful too. A pizza stone or baking steel can make your bread even better.
How do I master the techniques for baking artisan Italian bread?
Mastering Italian bread takes practice. You need to knead right, understand fermentation, and shape well. Guides can help you learn the science of bread making.
What are some common challenges in baking artisan Italian bread, and how can I troubleshoot them?
Challenges include temperature, humidity, and yeast issues. Watch these closely and adjust as needed. Knowing your ingredients and tools helps solve problems.
How do I store and maintain the freshness of my artisan Italian bread?
Keeping your bread fresh is key. Use the right storage, like freezing and thawing. Also, know how to revive day-old bread.
What creative variations and flavor additions can I make to my artisan Italian bread?
You can add many flavors to your bread. Try herbs, seasonings, whole grains, or special occasion loaves. This lets you make unique Italian loaves.